Taglia parte di un’immagine – supporto Microsoft, come tagliare un’immagine gratuitamente. e in 5 secondi?
Come tagliare un’immagine gratuitamente … e in 5 secondi
Contents
Per iniziare, vai al servizio online Rimuovere.bg.
Taglia una parte di un’immagine
Per un’immagine in un fileoffice, è possibile eliminare parti dell’immagine che non si desidera includere.
Come descritto di seguito, si inizia con la cancellazione automatica dello sfondo. Quindi indichi manualmente le aree dell’immagine che si desidera conservare ed eliminare.
Per i file grafici vettoriali, come SVG (grafica vettoriale scalabile), Adobe Illustrator Graphics (AI), WMF (format di Windows Metafile) e DRW (file di disegno vettoriale), la rimozione dello sfondo non è possibile. In questi casi, l’opzione Elimina sfondo è grigia.

Immagine originale

La stessa immagine dopo che alcune parti sono state eliminate
- Seleziona l’immagine che si desidera eliminare lo sfondo.
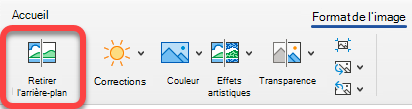
- Nella barra degli strumenti, seleziona Formato immagine >Elimina lo sfondo O Formato >Elimina lo sfondo.
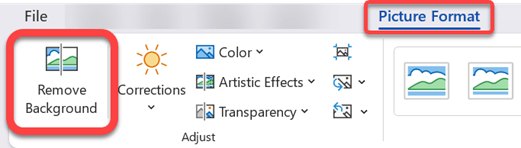 Se non Ci vediamo eliminare lo sfondo, Controlla di aver selezionato un’immagine. Potrebbe essere necessario fare doppio clic sull’immagine per selezionarla e aprire la scheda Formato immagine .
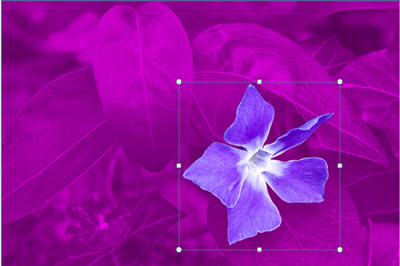
 - L’area di sfondo predefinita è il colore Magenta per contrassegnarlo per la cancellazione, mentre il primo piano mantiene il suo colore naturale.
- Quindi, nella barra degli strumenti, vai a Rimozione dello sfondo Ed eseguire una delle seguenti operazioni o entrambe:
- Se parti dell’immagine che si desidera conservare sono magenta (contrassegnate per la cancellazione), seleziona Segno, Quindi usa la matita da disegno a forma di gratuita per contrassegnare le aree dell’immagine che si desidera conservare.
- Per le parti dell’immagine che si desidera eliminare chi non è ancora magenta, seleziona Segnare le aree, Quindi usa la matita da disegno per contrassegnare queste aree.
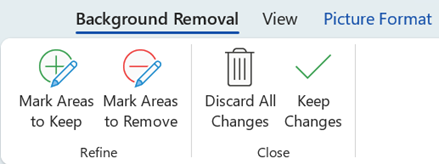
- Quando hai finito, seleziona Mantieni le modifiche. Le aree magenta dell’immagine vengono eliminate, lasciando uno sfondo trasparente.
- Se si desidera salvare l’immagine in un file separato per un uso successivo, fai clic con il tasto destro sull’immagine, seleziona Immagine, Quindi salva il file sul dispositivo.
Vedere anche
- Seleziona l’immagine che si desidera eliminare lo sfondo.
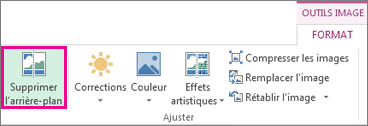
- Sotto Strumenti di immagine, sotto la scheda Formato , nel gruppo Regolare , Selezionare Elimina lo sfondo.
- Fai clic su una delle maniglie della linea di marchetto, quindi trascina la linea in modo che contenga la parte dell’immagine che si desidera conservare ed escludere la maggior parte delle aree che si desidera eliminare.
 A volte puoi ottenere il risultato desiderato senza alcun lavoro aggiuntivo sperimentando la posizione e le dimensioni delle linee del marchio.
Consiglio : Per annullare le aree contrassegnate, seleziona Elimina il marchio , Quindi selezionare la riga.
- Se parti dell’immagine che si desidera conservare sono magenta (contrassegnate per la cancellazione), seleziona Segno, Quindi usa la matita da disegno per contrassegnare le aree dell’immagine che si desidera conservare.
- Per le parti dell’immagine che si desidera eliminare chi non è ancora magenta, seleziona Segnare le aree, Quindi usa la matita da disegno per contrassegnare queste aree da eliminare.
Vedere anche
- Seleziona l’immagine.
- Seleziona la scheda Formato immagine nastro, quindi Seleziona Elimina lo sfondo.
 Se la scheda Elimina lo sfondo O Formato immagine non viene visualizzato, verificare di aver selezionato un’immagine. Potrebbe essere necessario fare doppio clic sull’immagine per selezionarla e aprire la scheda Formato immagine .
 - L’area di sfondo predefinita è il colore Magenta per contrassegnarlo per la cancellazione, mentre il primo piano conserva la sua colorazione naturale.
- Quindi, nella barra degli strumenti, vai a Rimozione dello sfondo Ed eseguire una delle seguenti operazioni o entrambe:
- Se parti dell’immagine che si desidera conservare sono magenta (contrassegnate per la cancellazione), seleziona Segno, Quindi usa la matita da disegno per contrassegnare le aree dell’immagine che si desidera conservare.
- Per le parti dell’immagine che si desidera eliminare chi non è ancora magenta, seleziona Segnare le aree, Quindi usa la matita da disegno per contrassegnare queste aree da eliminare.
- Quando hai finito, seleziona Mantieni le modifiche. Le aree magenta dell’immagine vengono eliminate, lasciando uno sfondo trasparente.
- Se si desidera salvare l’immagine in un file separato per un uso successivo, fai clic con il tasto destro sull’immagine, seleziona Immagine, Quindi salva il file sul dispositivo.
Come tagliare un’immagine gratuitamente … e in 5 secondi ?


Decidere un’immagine per creare un fotomontaggio non è più una pratica riservata solo ai follower di Photoshop. Un servizio online e gratuito, il fatto per te in pochi secondi.
Vorresti fare uno scherzo a un amico tagliando la sua foto per incrostarlo in un altro arredamento, ma le tue abilità in quest’area sono limitate ? L’arte del fotomontaggio non è più riservata solo agli utenti avvertiti di software di editing di immagini come Adobe Photoshop.
Rimuovere.bg, Un servizio online sviluppato da Benjamin Groessing e David Fankhauser, è responsabile dell’eliminazione dello sfondo delle tue foto a tempo di record, senza che tu debba sporcare le mani. Lo strumento, accessibile gratuitamente, utilizza un’intelligenza artificiale che identifica la presenza di persone in una foto per dissociarle dallo sfondo.
L’esportazione di immagini tagliate è attualmente limitata a una risoluzione di 500 x 500 pixel, ma potrebbe presto evolversi per offrire una migliore qualità. Qui in alcuni passaggi veloci, come tagliare un’immagine per integrarla in un nuovo paesaggio.
1. Taglia una foto
Per iniziare, vai al servizio online Rimuovere.bg.
Clicca su Seleziona una foto Per scegliere un’immagine memorizzata sul disco rigido del tuo computer o fare clic su Inserisci un URL per importare un’immagine da un collegamento.
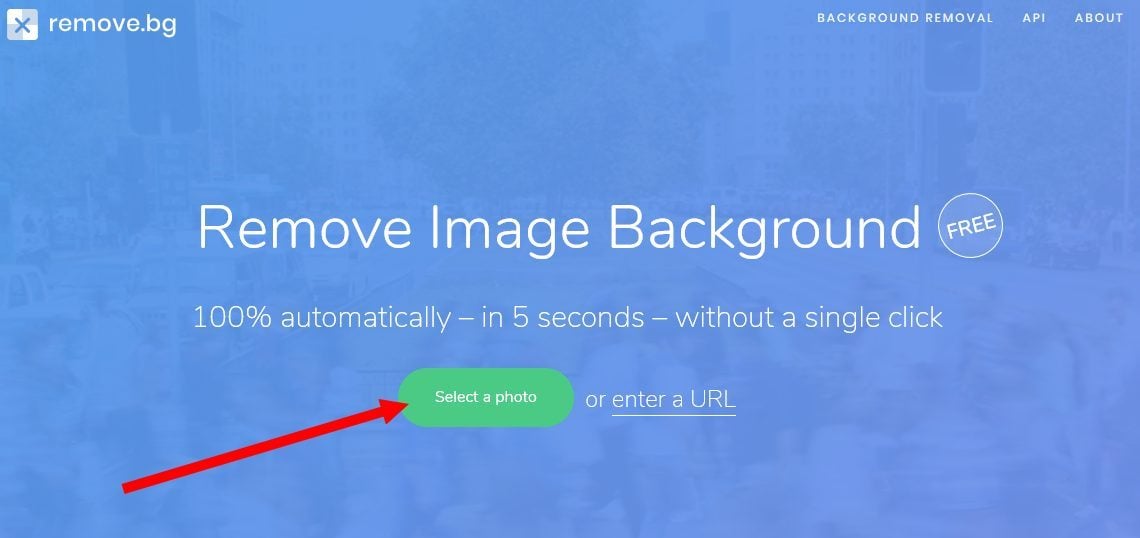
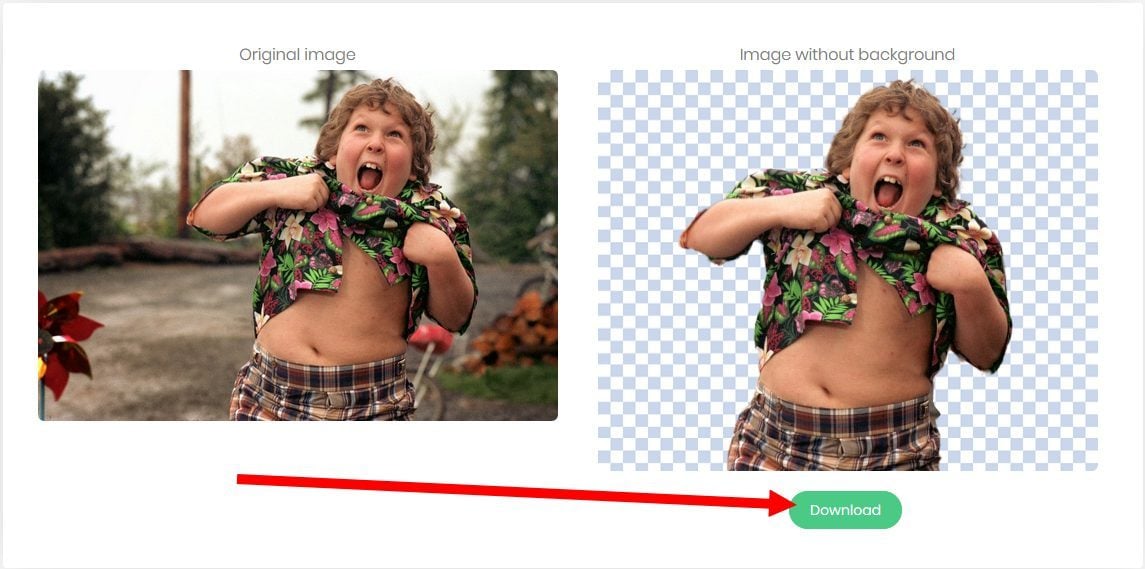
Il sito rileva automaticamente i presenti nella foto ed è responsabile dell’eliminazione automatica dello sfondo. L’immagine originale e il risultato ottenuto sono immediatamente visibili nella pagina. Clicca su Scaricamento Per scaricare l’immagine tagliata sul disco rigido.
Per scoprire anche in video
2. Crea un fotomontaggio
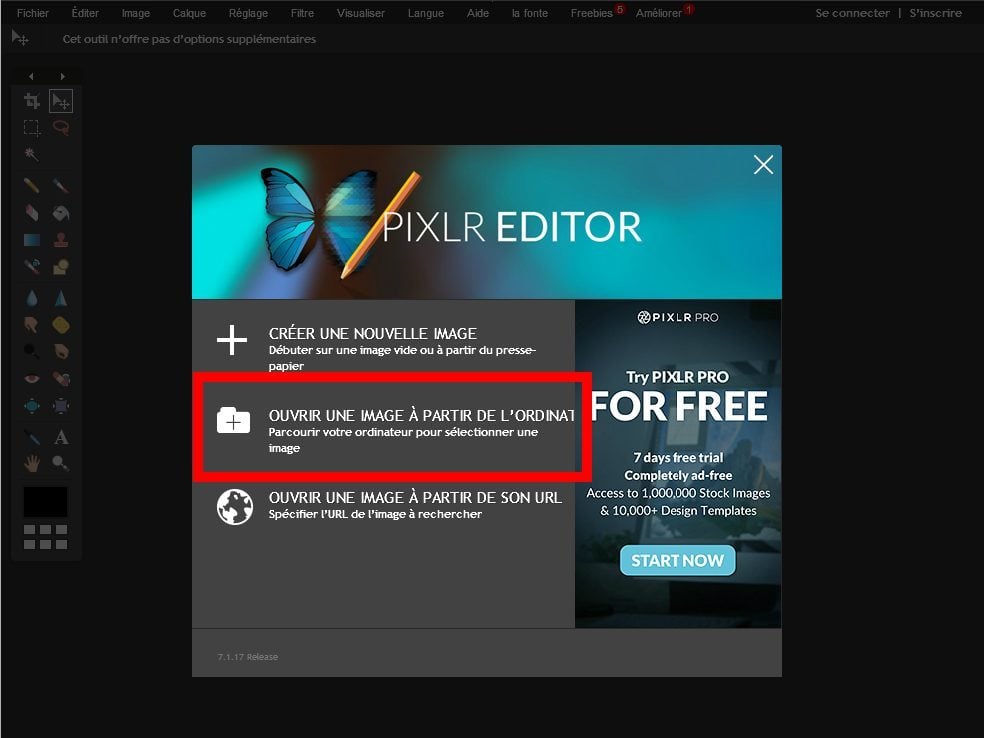
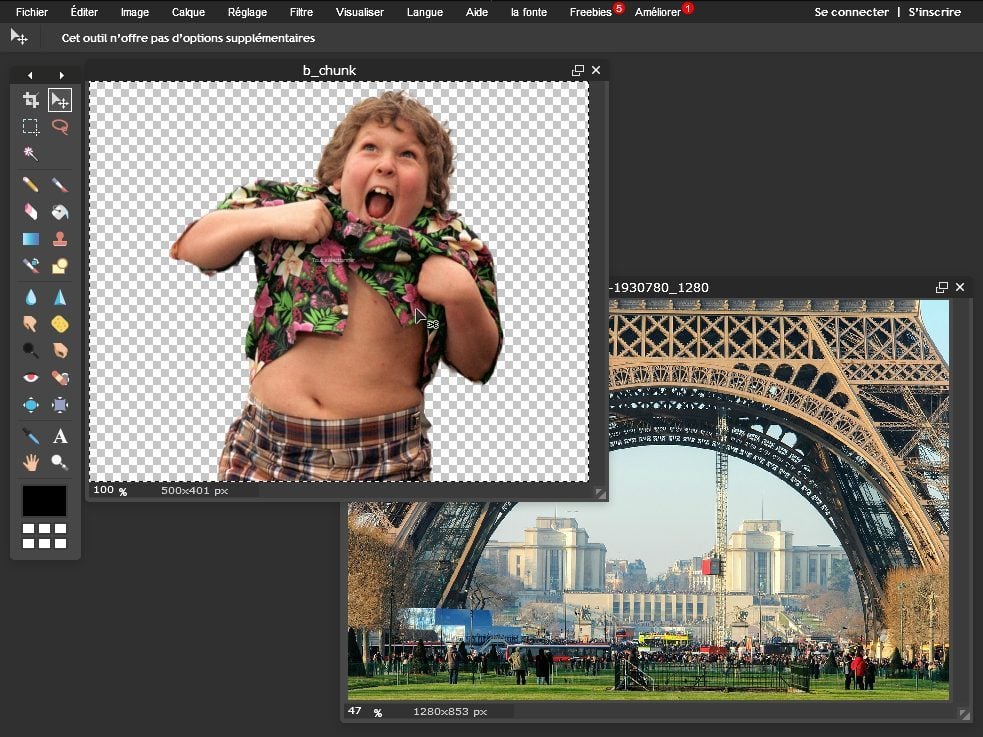
Se non si dispone di un software di fotoritocco installato sul tuo PC, apri il tuo browser Web preferito e vai a Pixlr. Questo editor di immagini online è gratuito e ti consente di fare un piccolo lavoro e il ritocco delle foto dal tuo browser.
Dalla home page di Pixlr, clicca su Apri un’immagine dal computer, Quindi selezionare le due immagini che si desidera importare nell’editor (mantieni il tasto CTRL sulla tastiera per selezionare diverse immagini della stessa directory).
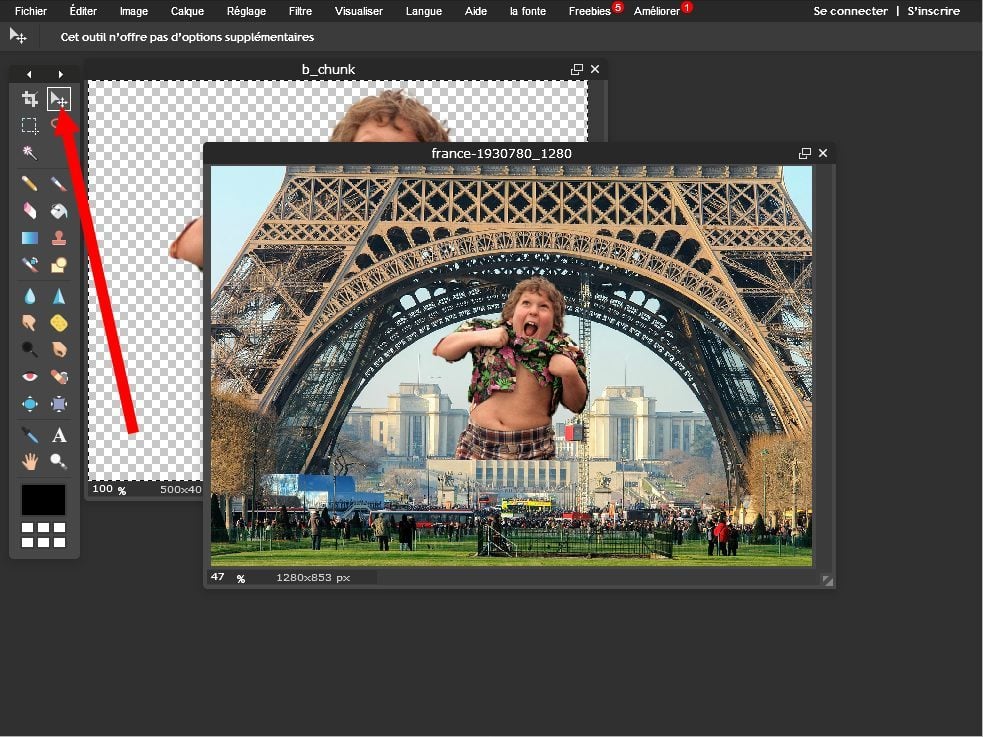
Mettiti sul livello con l’immagine di taglio facendo clic su di essa, usa il collegamento della tastiera Ctrl+a Per selezionare l’intera immagine, quindi Ctrl+c Per copiarlo negli appunti.
Quindi mettiti sull’immagine che verrà utilizzato come nuovo sfondo facendo clic su di esso, quindi fai Ctrl+V Per attaccare l’immagine tagliata. Scegli lo strumento di viaggio (tastiera tastiera) e sposta l’immagine ritagliata in cui lo si desidera sullo sfondo per lo sfondo.
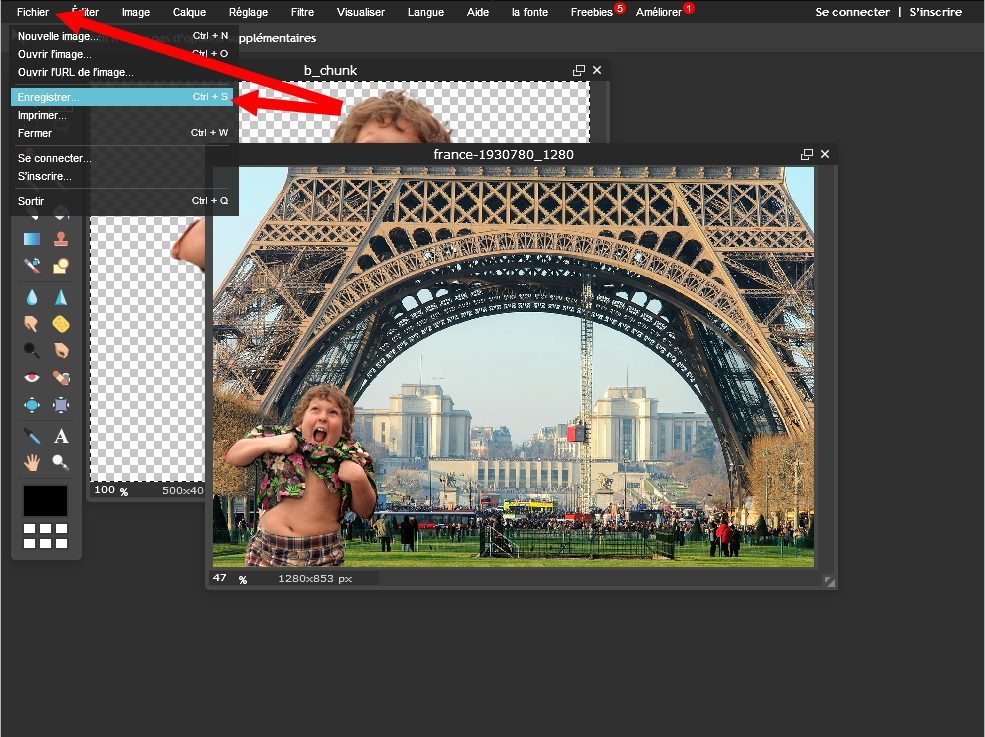
Una volta posizionata correttamente l’immagine, fai clic su File, Poi registrare.
Immettere un nome per la tua immagine, modificare la qualità della registrazione utilizzando il cursore dedicato e fare clic su OK.
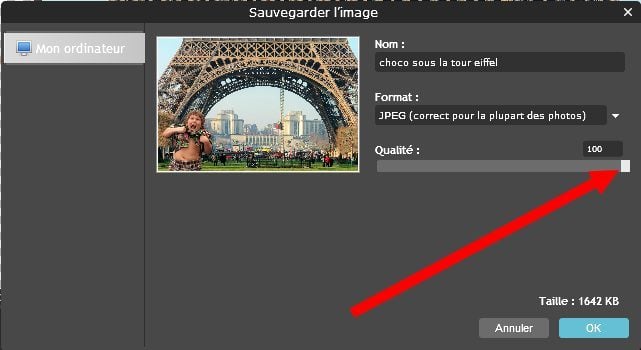
Windows File Explorer si apre, scegli una posizione di backup e convalida facendo clic su registrare.


 Ilyass Badry – 26 giugno 2023
  Condivido con te la mia brutta esperienza B la nuova Astra . Auto acquistata in mesi 10/22 Sono stato costretto a muovermi circa 9 volte il servizio dopo le scale per regolare i problemi della fotocamera 360 e aria condizionata e ora sono di fronte a un problema NV: cabina di pilotaggio e lo schermo che si spegne da solo . Hadchi Kamel e la Yalah Waslah W 5900 km sono davvero deluso .
 WAFA HH – 22 febbraio 2022
  Lei Ram – 23 febbraio 2022